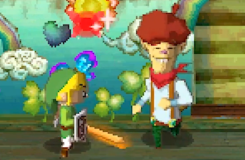
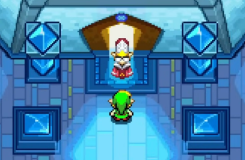
As is expected in a puzzle-oriented game such as Oracle of Ages, the boss battles in this game will feature combat more similar to puzzle solving rather than the familiar hack-and-slash feel of the bosses in Oracle of Seasons. On the whole, the bosses in this game don’t tend to be quite as difficult as in the other game–provided you know what you’re doing, that is.
Pumpkin Head
As the name would suggest, Pumpkin Head is a large sheet-wearing phantom with a jack-o-lantern on its head. It roams around the room, and whenever it faces Link, it will emit a triple-ring attack, which should be side-stepped. Also, beware of when it jumps up and tries to land on Link. As for you, simply go up to it and slash its body with your sword. After several hits, the sheet will fall, and the head collapse to the ground. Now pick up the pumpkin head, and the small true form of the boss will emerge, fleeing from you as long as you hold its head, or running right back into the head when you’re no longer holding it. Either throw the head off to the side and run in to slash the boss, or even better, throw the head at the boss to destroy it more quickly! Be careful with the latter strategy, though, because if you miss, it’ll be very easy for the ghost boss to be reunited with the head.
Head Thwomp
Definitely one of the most unique bosses in the whole series, the only real problem is that it’s nearly impossible to control the outcome of your attacks. Thankfully, its attacks are fairly easy to avoid. For one thing, as soon as you enter the room (this battle takes place in a side-scrolling screen), climb up to the top on the left side to avoid its occasional fire attacks. You’re going to need Bombs for this battle, and if you ever run low, you’ll have to wait for Head Thwomp to drop some for you on the floor below (move back and forth to dodge the large fireballs as you’re retrieving or waiting on it). Toss a Bomb inside the top of the boss–either throw it from the top ledge, or drop it from one of the moving ledges above the boss, whichever way is easier. Afterward, Head Thwomp will start spinning roulette-style. If it lands on the blue face, immediately hit the floor and get underneath the boss to avoid the attack of fire. If it lands on the purple face, climb down the ladder and get under the middle platform to avoid the deluge of boulders from the ceiling. If it lands on the green face, simply stay on the top platform to avoid the counter-attack. What you want is for it to land on the red face, for then Head Thwomp takes damage and drops a Recovery Heart on the floor. After four successful hits on the red face, Head Thwomp will be destroyed.
Shadow Hag
Looking remarkably like a Poe from the N64 Zelda titles (much more so than her counterpart Amy and Margaret in Oracle of Seasons), this boss is the first relatively hard boss in the game. If you look at her, she’ll turn invisible (and invincible) and then her shadow will follow you. Worse, sometimes she’ll split into four different shadows that will chase you around the room. Once she materializes, she’ll charge you in an attempt to ram you, as well as sending a swarm of flying insects after you. While she’s in shadow form, do your best to keep away (making sure not to face in her direction). Once she materializes, use your Seed Shooter to face away from her and shoot the wall in an attempt to have your seed bounce off the wall and hit her for damage. It doesn’t matter which seed you use. Keep up this one strategy, and you’ll eventually prevail.
Eyesoar
This mysterious monster is a giant winged eyeball encircled by four smaller winged eyeballs–very much reminiscent of Patra from the original Legend of Zelda. Thankfully, Eyesoar is a much easier boss to tackle than Patra was. Take out your Switch Hook and use it to attack the miniature eyes, one hit (with either Switch Hook or Wooden Sword) destroying them right then and there. Watch out, as the smaller eyes regenerate quickly. Keep Switch Hooking and eventually you’ll latch onto Eyesoar itself, switching places with the giant eye. When this happens, the smaller eyes will scatter around, flying to and fro, giving you free licks on Eyesoar. Run up and slash it until it regathers its offspring around it again. Repeat this process to score a fairly easy victory.
Great Moblin
The Great Moblin does not guard any great dungeon, nor does he keep concealed any of the Essences of Time. Rather, he’s more of an overworld boss whom you encounter in the comfort of his own palace. He’s been wreaking chaos on the Gorons of Rolling Ridge, and it’s time now to put an end to his tyranny. When you enter his lair, he and two cronies (from either top corner) will start bombarding you with large bombs. What you must do is use the Power Bracelet to lift a bomb and throw it back at the Great Moblin, damaging him. The trouble is, as soon as you throw it at him, he picks it up and then throws it right back at you! So pick it up, and wait until it’s turning red and just about to explode, and then lob it back at the tyrant before he has a chance to pick it back up. After enough successful hits, both the Great Moblin and his palace will be no more, granting you access to the Bomb Flowers that he’d stolen.
Smog
By far the most puzzle-oriented boss battle in a puzzle-biased game, Smog is a sentient cloud of smoke bent on playing an evil game with Link. There are four phases of this battle, which you must win; Smog’s only attacks are colliding with you if you get too close as well as shooting fireballs at you throughout the battle. Your goal is to arrange the blocks by pushing them and using the Cane of Somaria in such a way that the smaller pieces of Smog collide and reunite–when the boss is its whole self, slash away! For the first phase, simply push a block between the two of them, such that Smog reunites with itself. For the second phase, push a block on the right side of the leftmost block set, then create another block when the Smog piece is on that right block, bordering the middle block set. Next repeat the deed on the opposite side. If done correctly, Smog will reunite. For the third phase, push the southernmost block into the central block set, then use other blocks to cause the Smog pieces to reunite. For the fourth and final phase, create a block with your Cane in the right place for making a straight diagonal line of blocks. Done in this way, the Smog pieces should eventually reunite. Note that if at any time you get stuck, you can press a switch in the corner to reset that particular puzzle.
Octogon
Similar to Bigocto in Ocarina of Time, Octogon is an enormous Octorok-like enemy that has command over the waters of this room. First off, set your sword to the A button in case you eventually need to hack at the boss underwater. Also note the jars to your right and left; they shield you from Octogon’s side attacks, so it’s recommended you keep them intact. Your own shield also blocks Octogon’s rock spitting attack. It swims around the room, keeping its weak point (its face) away from you, until it tries to shoot at you, which is your chance to slash away at it. When it goes underwater, if you remain on the surface, it’ll rain down boulders on you. If you chase it underwater, it’ll spit bubbles at you, so be dodge these attacks. As you go underwater with it, its face will be pointed toward you more, so take the opportunity to intensify your attack. Don’t let up, and you should have this boss beat in no time.
Veran (as Nayru)
At the start of the game, Veran tricked Link and took advantage of him to possess Nayru’s body. Now comes the time to rectify things! In what is a sneak preview of the climactic battle at the end of the game, after you make your way through Ambi’s Palace to the throne room, Veran will challenge you in Nayru’s body. Now recall an earlier cutscene in the game when the Veran-possessed Nayru showed an aversion to Mystery Seeds. This is a clue–and Veran’s weakness! As the battle gets underway, Nayru will teleport around the room, generally appearing near statues for some cheap protection. If you get too close, she’ll just warp elsewhere. If you’re far enough away, though, she’ll charge up a ball of energy and then release a series of smaller energy orbs at you. When she’s charging up, that’s your chance! Shoot her with a Mystery Seed out of your Seed Shooter, and Nayru will fall down stunned. Then use your Switch Hook to pull Veran out of her body, then slash away furiously at the vile sorceress, after which she’ll return to Nayru’s body and the battle will repeat itself. After doing this several times, Veran will concede a temporary victory and leave Nayru’s body forever–only to possess Queen Ambi instead.
Plasmarine
This is a remarkably simple boss battle for being so late in the game. Plasmarine is a giant electricity-laden jellyfish that will attempt to shock you into submission by diving at you while it’s body is electrified, as well as shooting a slow orb of energy at you. Unfortunately, none of your weapons avail to harm Plasmarine at all. Instead, it is weak only to its own attack! Therefore, whenever it shoots an orb at you, Long Switch with it so that the orb hits Plasmarine instead! Simply repeat this strategy until you win. Just be careful not to Long Switch it when it’s electrified, or Link will take damage.
Ramrock
Ramrock, similar to Smog, is a puzzle-based boss battle that transpires in multiple phases. The boss itself is a mechanized stone brute that attacks in a variety of ways, depending on what phase of the battle you’re on. For the first phase, Ramrock will send out his stone fists in your direction; the way you damage the boss is to use your sword to whack the fists right back at the face, dealing damage. Try to deflect them at the right angle, but if you’re having trouble, it’s easier if you get right up next to Ramrock–but you’ll take damage more easily there. Hit it three times. For the second phase, Ramrock will try to crush you between its newly spiked hands. Instead, throw a Bomb in so that the hands crush it instead–try to position yourself so that Ramrock is always to the north of you when you throw. If you run low on Bombs, slash the bushes in the corners for more. Bomb it three times. For the third phase, Ramrock will shield its face and fire orbs at you, as well as going across the room emitting a laser. Dodge the orbs and hug the east or west wall to avoid the laser. Pull out your Seed Shooter and use it to ricochet a Mystical Seed against the wall and hit Ramrock in the back. Three or four hits should do the trick. For the fourth and final phase, Ramrock gains cannon balls on chain leashes for arms. The boss will fire one (on rare occasions, both) at you. Whichever one is not fired–i.e., is still close to the body–run up to it and pull it out, and when it’s extended at its farthest point, release, and it will slam into Ramrock’s face, dealing damage. Three such hits will destroy the boss for good.
Veran (as Ambi)
The first phase of the game’s climactic battle is little different from the one at Ambi’s Palace. The only difference is that now you’re in a larger room, with more pillars obstructing your path, and Veran adds spiders to the mix of attacks that she uses to thwart your tactics. Either evade or slash the spiders and use the same strategy as before: Wait for Ambi to charge up an attack, then hit her with a Mystery Seed to stun her. Then Long Shot Veran out of the queen’s body and hit her with the sword. After several such hits, Veran will vacate Queen Ambi’s body for good, and it’ll be time to move on to a new phase of battle.
Veran Transformed
Now posing as a giant butterfly-like creature, Veran is starting to show you her true power. First, she summons four Dark Links to the battle. All they do is mimic your movements, with no real attacks of their own, but they’ll still get in your way (and damage you in the process). Try to gather them all into a single corner, then hack away at them with your sword. Note that every Dark Link vanquished will leave behind a Recovery Heart. Now for Veran herself, she will fly through the room, going in and out, over the walls and everything. She’ll occasionally stop to hurl fireballs at you, which should be avoided as best you can. Focus on simply staying near the center of the room and slashing at her with your sword every time she swoops by. After a good many hits, the Black Tower will crumble, but Veran won’t be through with you just yet.
True Veran
This is it! For the last hurrah, Veran reveals her monstrous true form–which yet is in three different versions, all of which will switch in and out randomly over the course of the battle. The first form that she takes on, and easiest to tackle, is her beetle form. Here, she’ll jump around the room and attempt to crush you. Keep moving! After several jumps, she’ll peer her head out of the shell. This is your cue to run in and slash, but be sure to get back on the move once her head retreats back inside. Another form she takes is that of a bee, during which time she fires off stingers at you as well as unleashing swarms of bees on you. Evade the stinger, slash the bees, and watch out when she tries to fly into you. Similar to the previous phase of the battle, just use your sword to attack her easily any time she comes within range. The hardest form to combat, however, is her spider form. In this form, she moves around the room diagonally, trying to collide with you. She’ll also use a web to lift herself to the ceiling, then try to fall crashing down on you. Worse yet, she’ll try to fire her web at you, and if she catches you, she’ll pick you up and slam you into the ground, dealing incredible damage to you. Attacking her in this form is the hardest part, for you must throw a Bomb at her and hope to get it to explode on her, which is the only way to damage her–difficult, since she’s always on the move. She goes in and out of these various forms at random, so keep at it all the way until she is finally slain and Labrynna saved at last…for now!


Tingle’s Rosy Rupeeland was released only in Japan and Europe, never making it to the USA due to lackluster sales. Surprisingly, the game was well-received among those who did play and review the game. You play as Tingle, a 35-year-old (and single) man lost in the world. Guided by the mysterious figure Uncle Rupee, Tingle fills a mystical spring with money and gain access to the wonderful Rupeeland, a paradise where nobody has to work. Along the way, hire body guards to protect Tingle – but from what? All may not be as it seems in Tingle’s quest for monetary gain, and Rupeeland just might not be so rosy after all...