Ocarina of Time Challenges
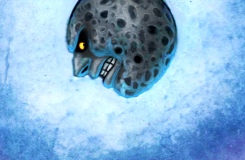
{{bubble}{Volvagia}{}{}{
Challenge #1: Defeat Volvagia using the Megaton Hammer only twice.
Difficulty: Moderate
The Megaton Hammer must be used once at the start of the battle and again at the end before you deliver the final blow to the dragon. For the rest of the battle you’re able to damage the dragon using arrows and your sword, but only when Volvagia is flying about the arena. When Volvagia flies out of the fire pits, you can shoot its skull with an arrow to hurt it. When the dragon circles you while breathing fire, you can also hurt it by slashing its face – preferably with the Biggoron’s Sword. This strategy is fairly dangerous, and Volvagia’s attacks deal significant damage.
}}
{{bubble}{Morpha}{}{}{
Challenge #2: Defeat Morpha by attacking only from the four central platforms.
Difficulty: Easy
Morpha isn’t terribly difficult, but the battle’s even easier for players who never leave the corners of the arena, outside the tentacles’ range. Get out of the safe zones and fight where you’re vulnerable to attack.
}}
{{bubble}{Iron Knuckles}{}{}{
Challenge #3: Defeat an Iron Knuckle wearing Hover Boots the enire battle. Defeat the two Iron Knuckles in Ganon’s Tower wearing Iron Boots the entire time, activating both enemies simultaneously.
Difficulty: Hard
You’ll need to be careful and precise with your swordplay and defensive maneuvers. This is good practice for the brutal Ganon challenge.

}}
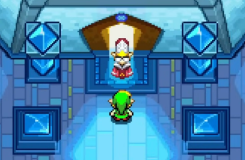
{{bubble}{Twinrova}{}{}{
Challenge #4: Defeat Twinrova wearing Iron Boots the entire battle.
Difficulty: Moderate
This gets problematic when you stun Twinrova. She collapses onto a ledge that you need to jump to. You’ll need to find a way to get there, but the real challenge is getting back to the main platform.

}}
{{bubble}{Ganondorf}{}{}{
Challenge #5: Use a spin attack to deflect Ganondorf’s lightning volleys. Do not stand in the corners of the room.
Difficulty: Moderate
When you deflect the regular lighning attacks with a spin attack, their speed increases. By standing on the sides of the arenas and not in the corners, you have less time to react. There is also the risk of too much of the floor falling out beneath you.

}}
{{bubble}{Ganon}{}{}{
Challenge #6: Do not use Light Arrows or regular arrows, and do not run beneath Ganon’s legs to get to his tail.
Difficulty: Hard
You’ll want to have the Biggoron’s Sword for this challenge. Since you can’t blind Ganon with Light Arrows and you can’t take the easy way out and roll between his legs, you must jump attack his face. He will pause to shake his head briefly – in that time, you must run around to his tail and slash it before he moves. This strategy forces you to be in the range of Ganon’s powerful sword attacks. Prepare for a much more fast-paced and dangerous final battle.
Challenge #7: Do not use Light Arrows or regular arrows, and do not run beneath Ganon’s legs to get to his tail. After you deal 4 to 6 blows, don the Iron Boots and continue. Once Ganon collapses and you reclaim the Master Sword, don the Hover Boots for the remainder of the battle.
Difficulty: Brutal
Again, you should have the Biggoron’s Sword for this. You may also want to stock up on Heart Containers and Blue Potions. Nayru’s Love is extremely helpful as well. To attack Ganon while wearing normal boots, jump attack his face and run to his tail while he shakes his head. To attack while wearing Iron Boots, get creative. To attack while wearing Hover Boots, you may want to revert back to the strategy of jump attacking Ganon’s face. If Ganon attacks you while you wear the Hover Boots, you’ll ricochet around the arena like a pinball.

}}
Next page: Majora’s Mask Challenges